

Learning Objectives
After completing this tutorial, you should know how to:- Use fabric DSDs
fabout_dsdandfabin_dsdto send and receive data between PEs - Utilize asynchronous builtin operations on fabric DSDs
- Define a local task which is activated by a
local_task_id
Example Overview
Your program will run on two processing elements (PE). This tutorial demonstrates the program with a simulated fabric consisting of a 9 x 3 block of PEs. The program will first copyb into the left PE’s y array.
Then, it will copy the left half of A’s columns into the left PE,
and the right half of A’s columns into the right PE.
Similarly, it will copy the first N/2 elements of x
into the left PE, and the last N/2 elements of x into the right PE.
Each PE will then compute A*x for its local pieces of A and x.
Thus, both PEs perform a matrix-vector product for an M x N/2 matrix.
The PEs will increment their local y arrays by this result.
The left PE then sends its y array to the right PE, and the right PE
increments its local y array by the received values.
Because the left y array contained the contribution from b,
the final summed y on the right PE is the GEMV result.
The host then copies y off of the right PE.
Problem Steps
Visually, this program consists of the following steps: 1. Host copies b into y array of left PE.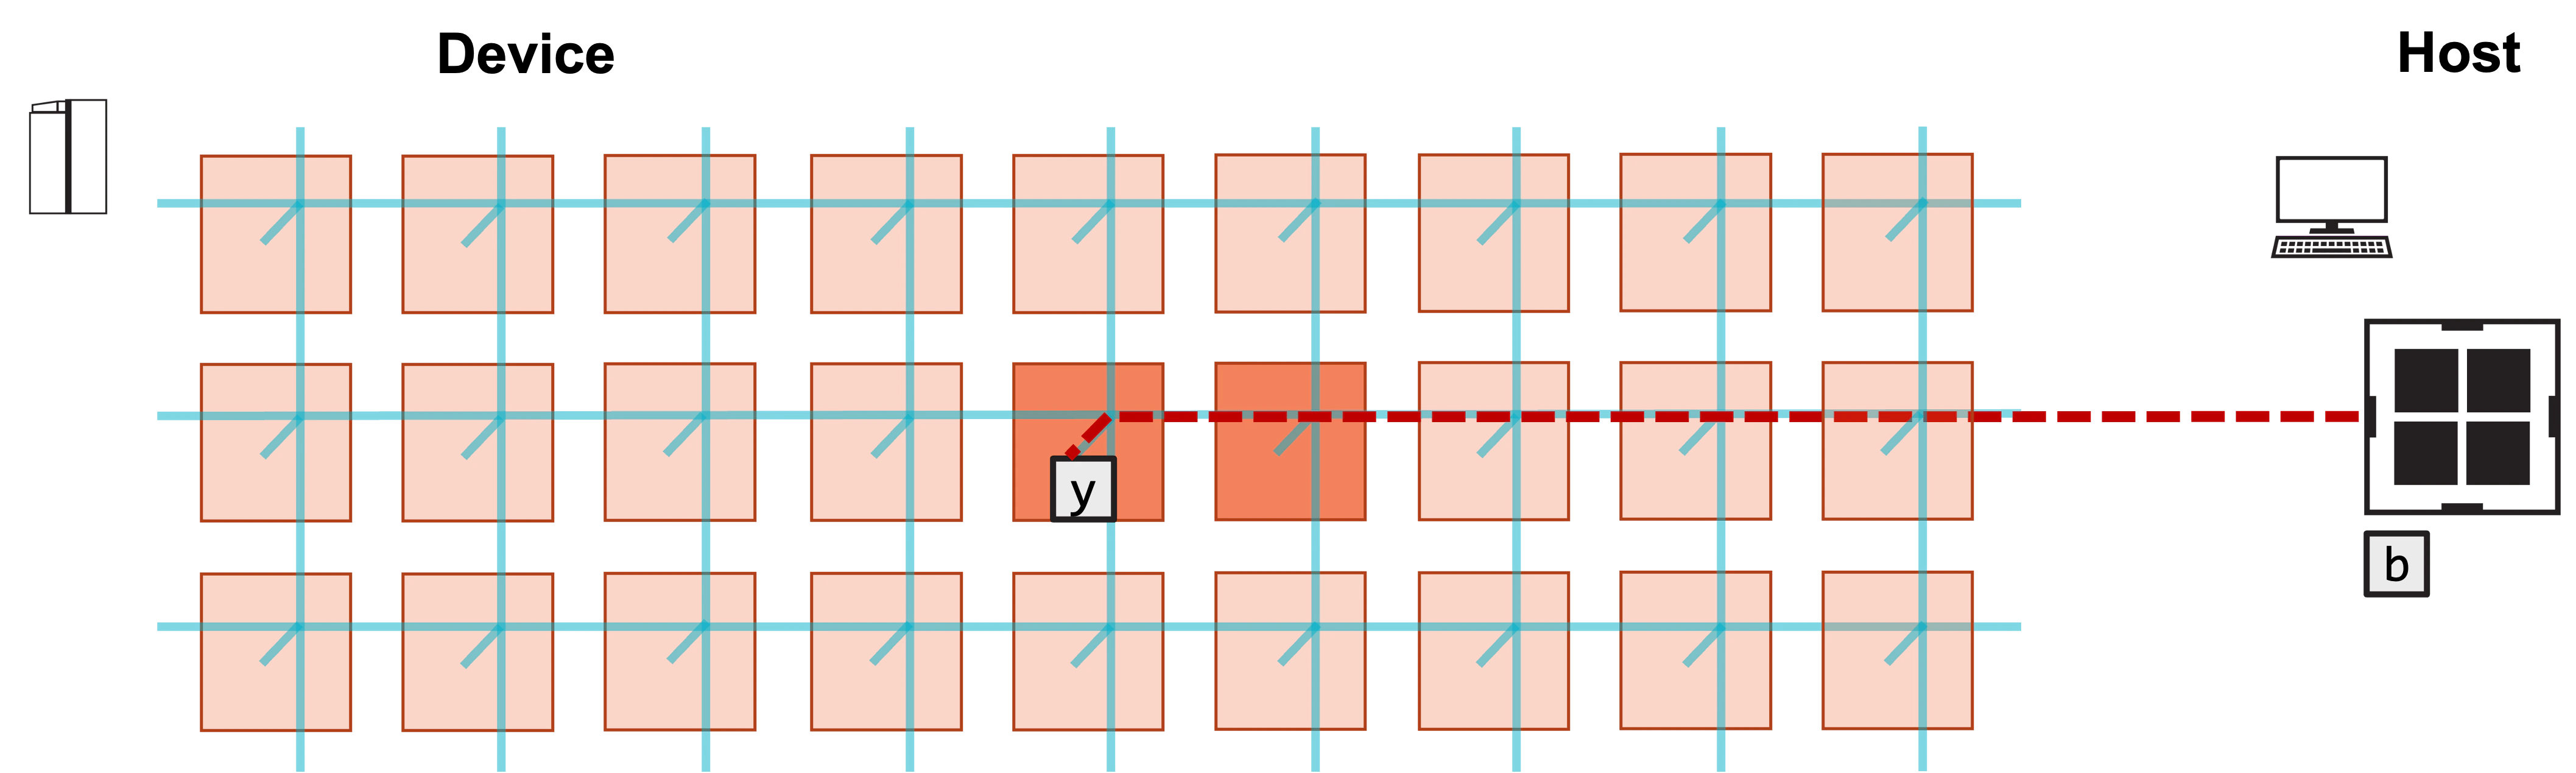
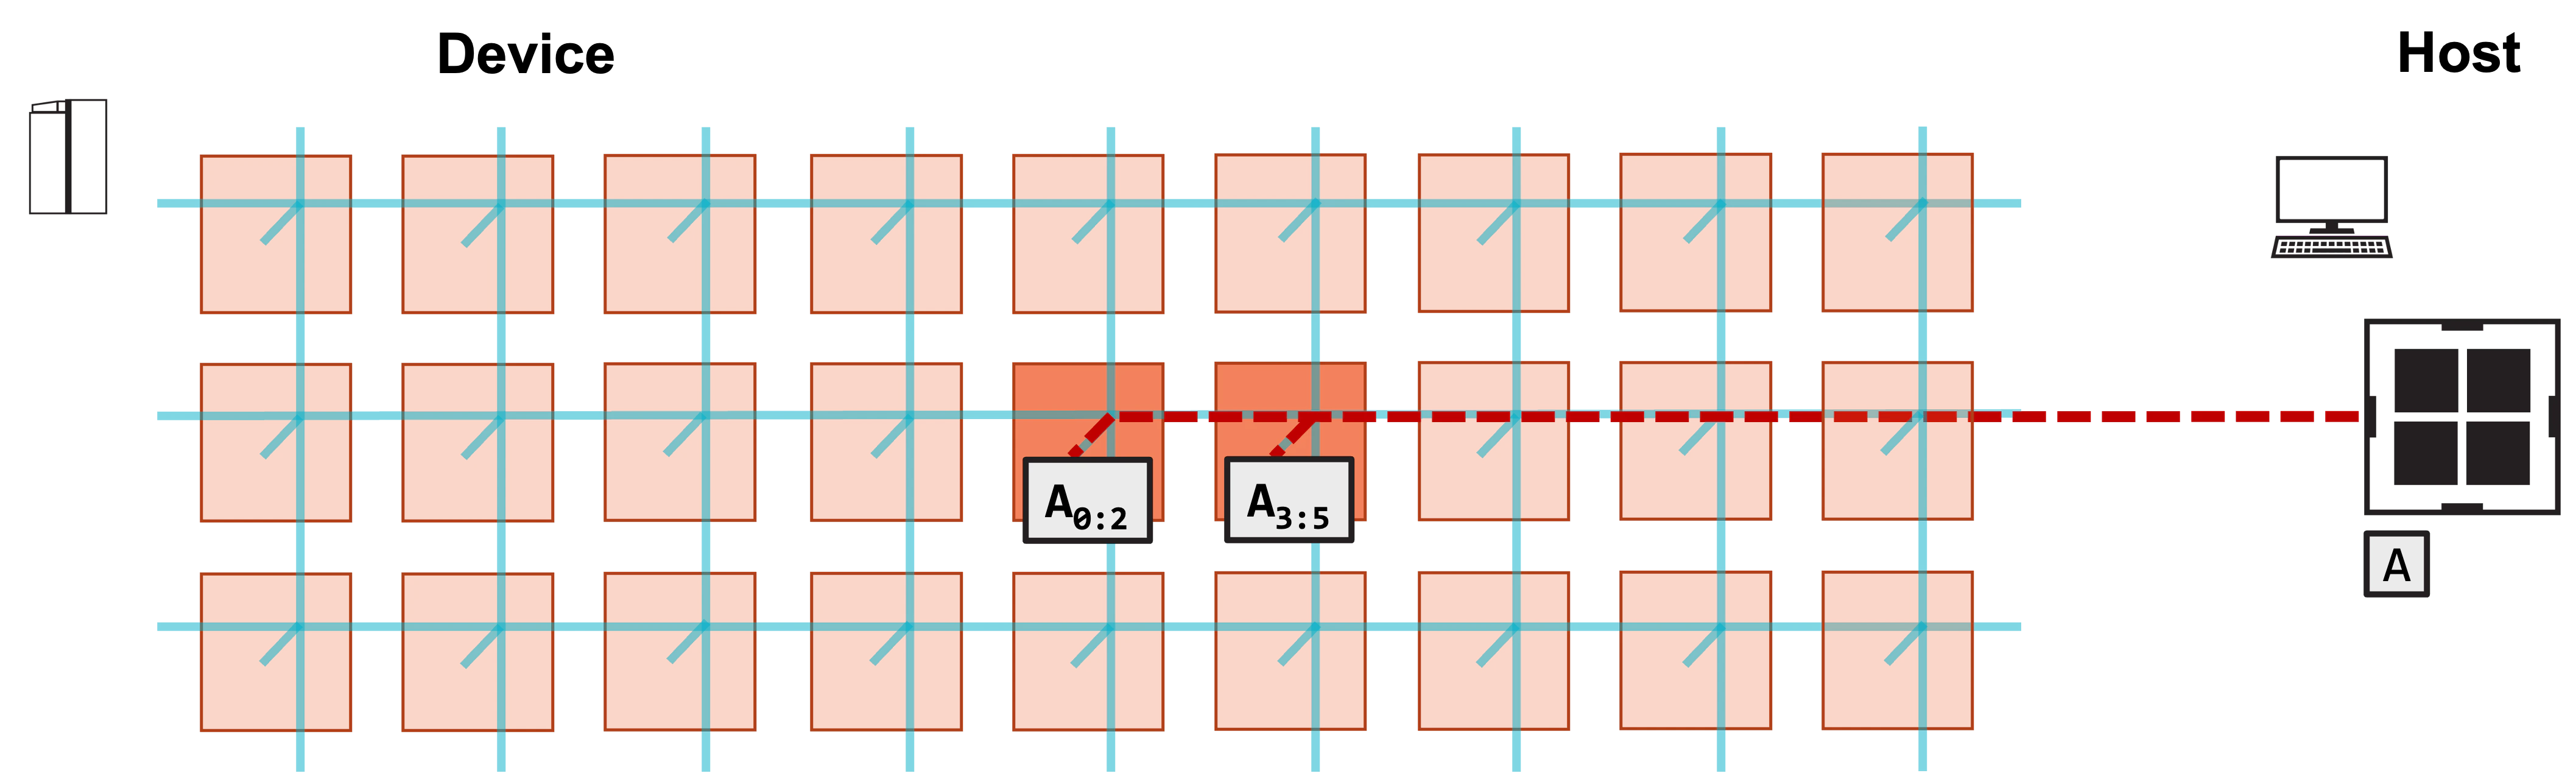
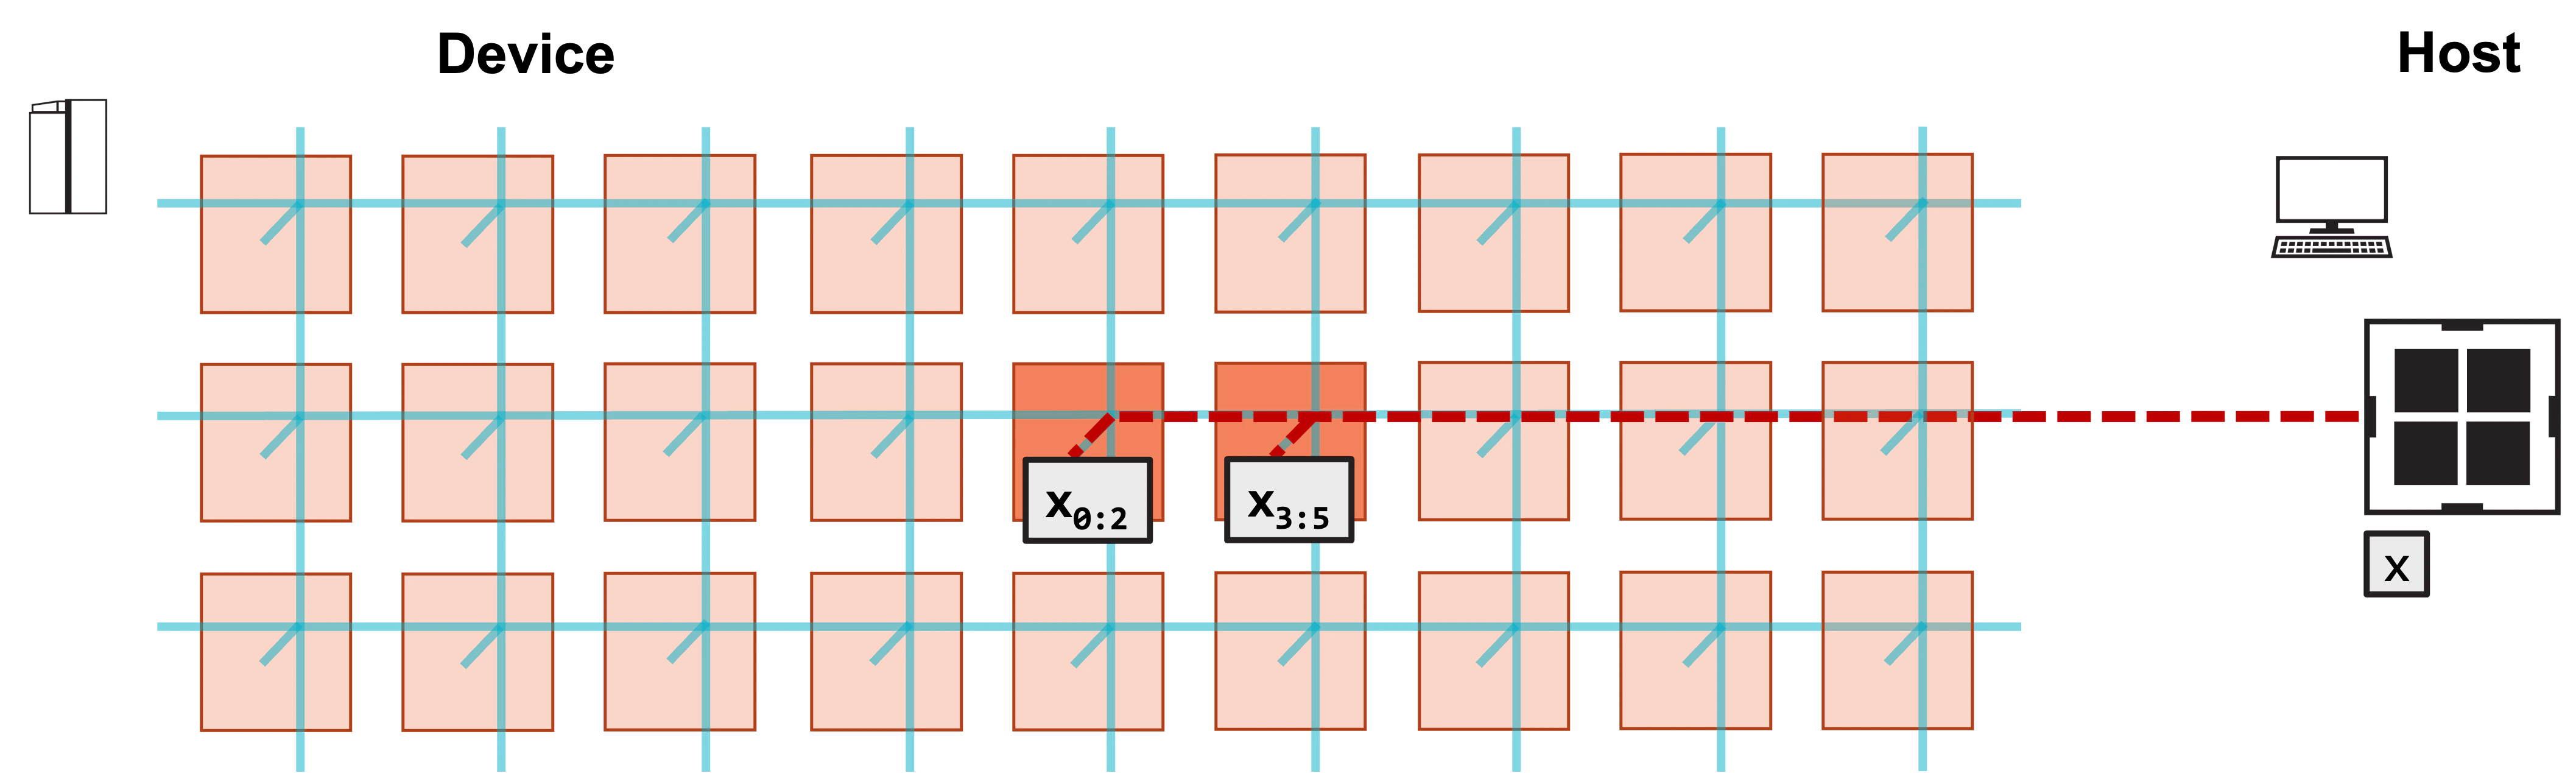
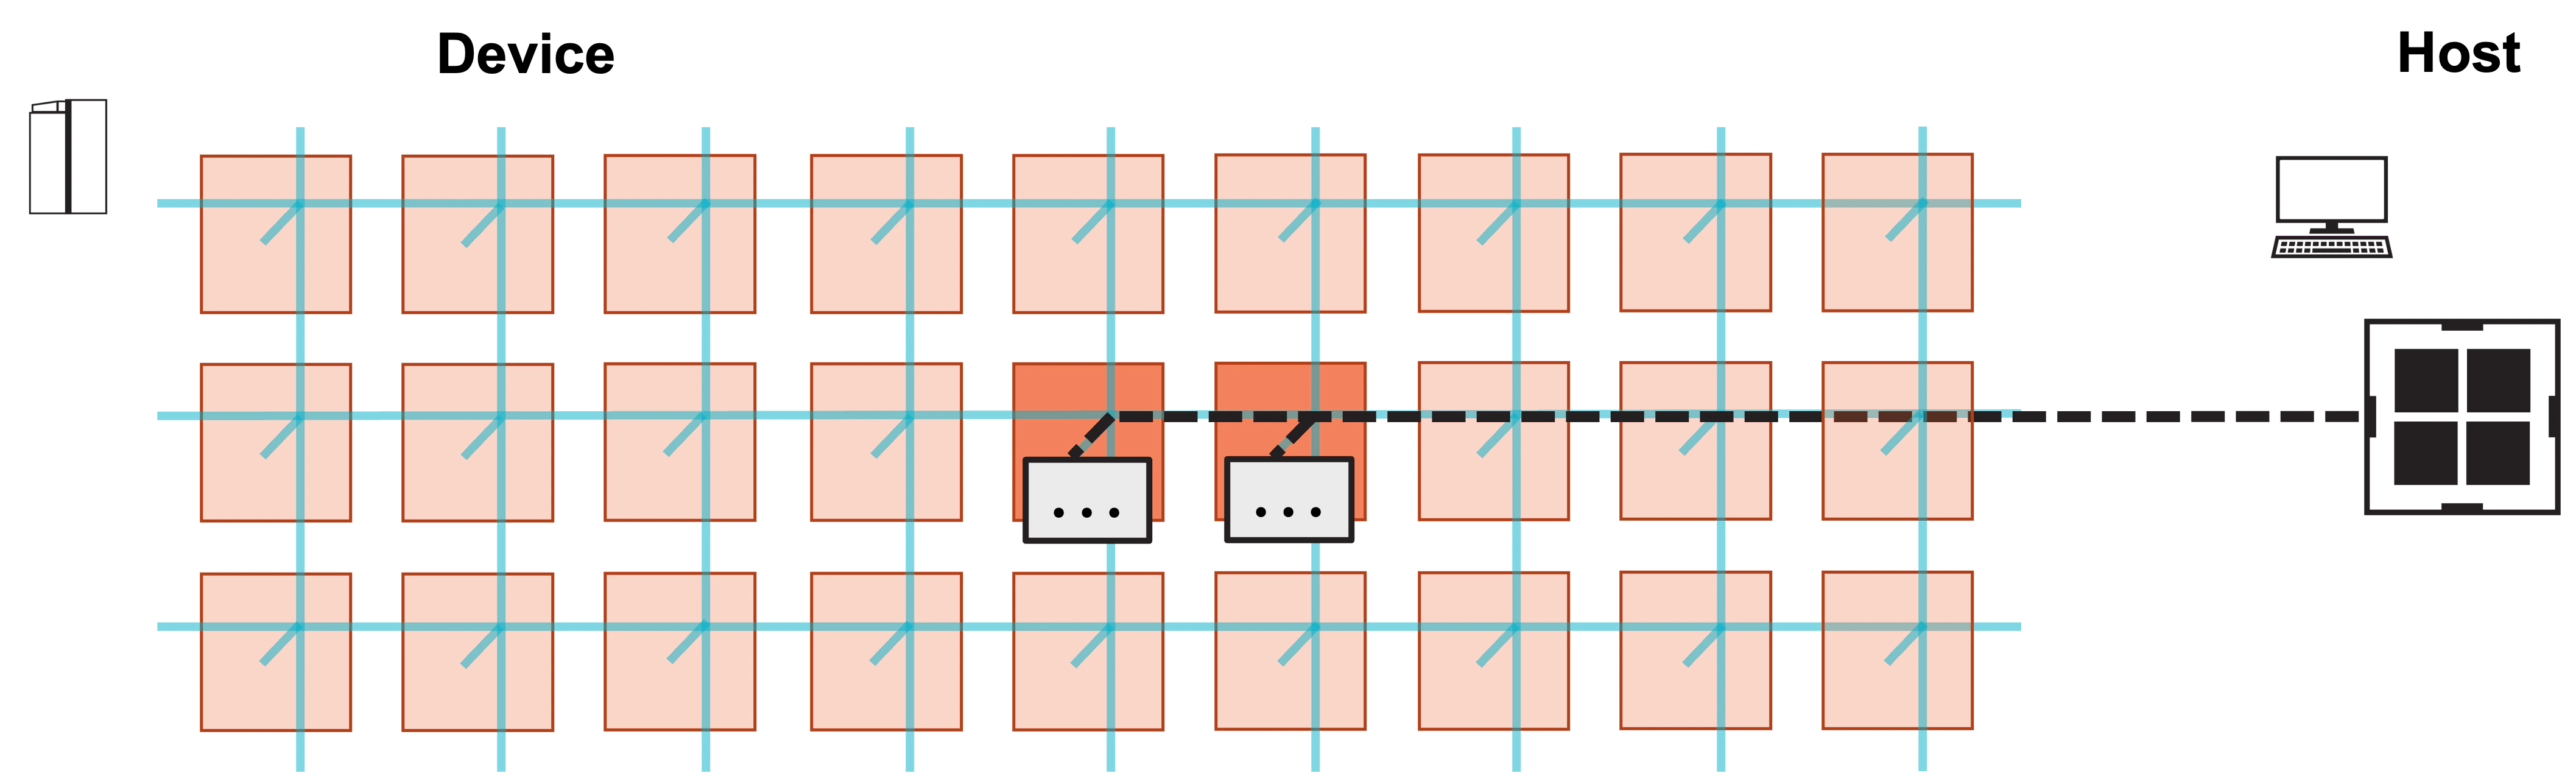
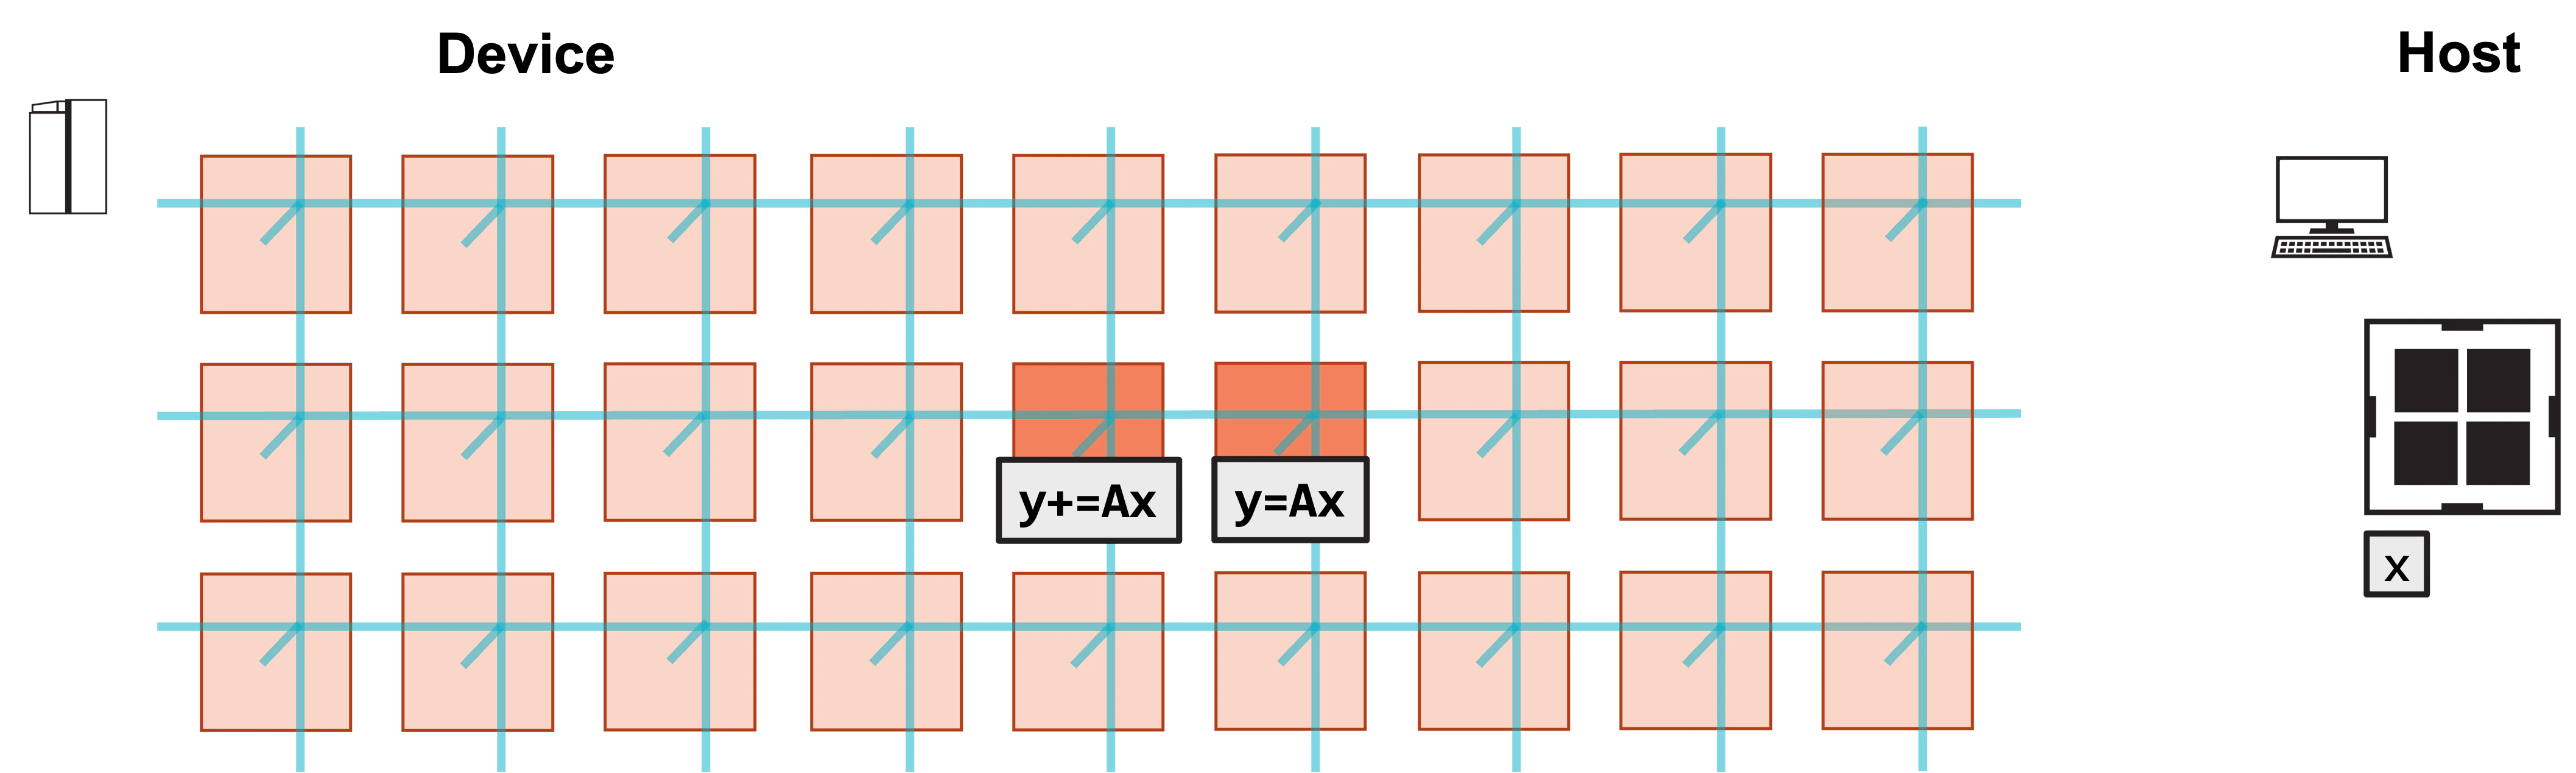
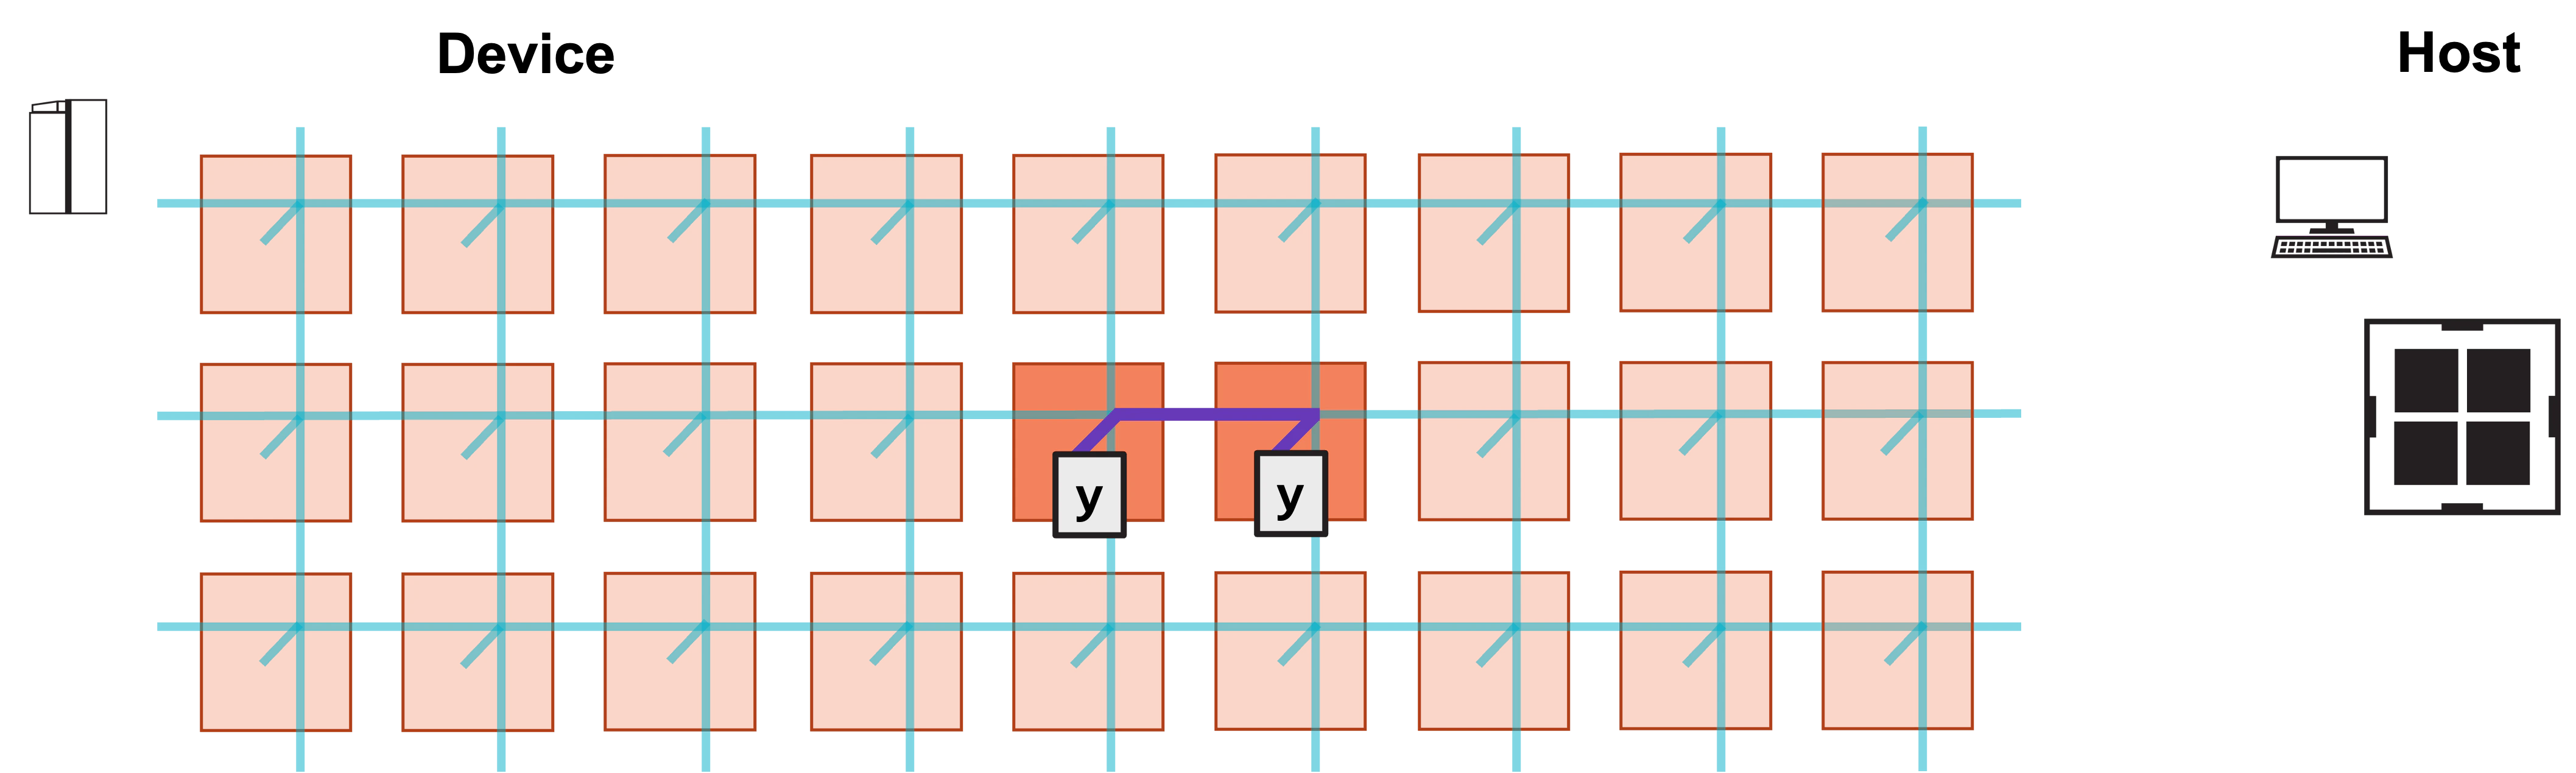
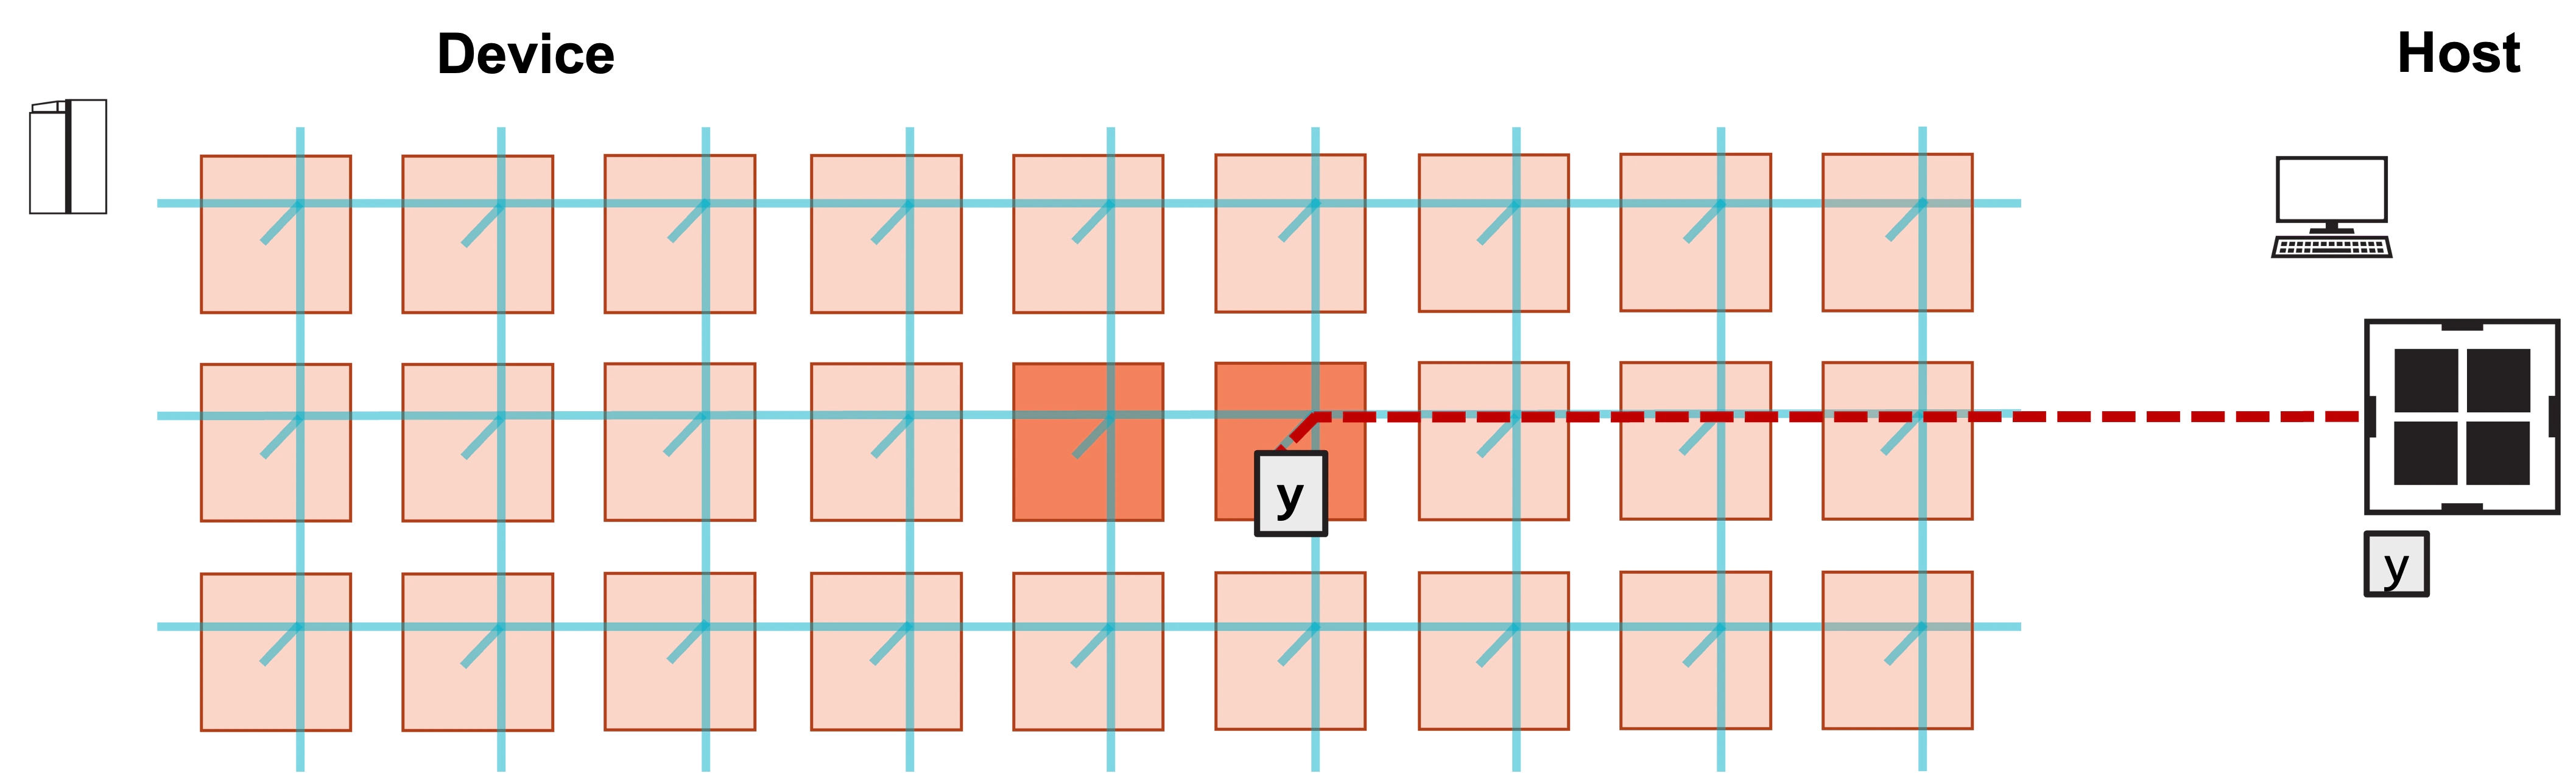
Write the CSL
What needs to change in the layout to distribute the GEMV between two PEs?- Define several new parameters for the two PE programs.
This includes a
pe_id, used to differentiate between the left and right PEs, and a color, which is used to route data between the PEs. - Set the color configuration on both PEs for the color
used to send the left PE’s
yarray to the right PE.
layout.csl, included below.
@set_tile_code calls, one for the left PE (0, 0),
and one for the right PE (1, 0).
Both PEs take a new parameter, N_per_PE, equal to N / 2.
This is the number of columns of A that each PE will receive
and operate on.
Both PEs also receive as a parameter a pe_id: the left PE
has pe_id 0, and the right PE has pe_id 1.
pe_program.csl, covered next, shows how pe_id parameterizes
the behavior of the program.
There are also two @set_color_config calls, to set the configuration
of send_color on each PE:
RAMP, NORTH, SOUTH, EAST, WEST.
The cardinal directions refer to the routers of neighboring PEs:
NORTH is the PE directly above the current PE, and so on.
RAMP refers to the connection between a PE’s router and its compute element (CE).
When setting a route for a color on a given PE, the receive rx and transmit tx fields
are from the perspective of the router.
Thus, receiving from the RAMP means that the compute element is sending data up to the
fabric, where it can then be transmitted across the fabric.
For the left PE (0, 0), send_color will send up the PE’s RAMP to the fabric, and then
transmit data to the EAST.
For the right PE (1, 0), send_color will receive data from the WEST on the fabric
(i.e., from the left PE), and then transmit it down the RAMP to its compute element.
Now take a look at the new pe_program.csl, included below.
N_per_PE, pe_id, and send_color,
this code also introduces exit_task_id, the first value of type
local_task_id, covered a bit later.
The A array now has size M*N_per_PE instead of M*N, since each PE
only stores half the columns.
To make the data transfer easier, A is now stored column-major instead
of row-major.
Notice that A_dsd now accesses M contiguous elements, instead of M
elements strided by the row size, since it’s now stored column-major.
The gemv function operates almost identically to before, except it only loops
over N_per_PE columns instead of N columns.
Since A is now column-major, @increment_dsd_offset must increment
by the length of an entire column instead of by one element.
Note that on the left PE, y already contains the elements of b before
gemv executes.
Fabric DSDs and Async Operations
Thecompute function, which is called from the host, first calls gemv
to compute the local contribution to y on each PE.
Then, the left PE calls send_right, while the right PE calls recv_left.
send_right defines a fabout_dsd, which is used to send wavelets to the
fabric along the color send_color.
Note that this fabout_dsd is given the extent M, since the goal is to send
the M elements of y along the fabric.
On WSE-3, a fabric DSD is bound to a color indirectly via its queue, so
.fabric_color is omitted from the WSE-3 form; on WSE-2 the color is
specified directly on the DSD.
The @fmovs operation copies the M elements accessed by y_dsd
into out_dsd.
The .async = true field makes this operation asynchronous.
The .activate field specifies a local_task_id to activate when this
operation completes.
When this operation completes, exit_task_id will be activated.
recv_left defines a fabin_dsd to receive the wavelets sent along
send_color.
The @fadds operation here increments the right PE’s y_dsd by the
elements received in in_dsd.
Thus, after this operation, y_dsd contains the final GEMV result.
This builtin also executes asynchronously, and activates exit_task_id
when complete.
Tasks and Activatable Task IDs
Now, what does activatingexit_task_id do?
In the comptime block, the @bind_local_task builtin binds exit_task_id
to the task exit_task.
When exit_task_id is activated, exit_task, which unblocks the memcpy
command stream, executes.
This task must execute on both PEs before control is returned to the host.
Write the Host Code
The host code must:- Copy
binto the left PE’syarray - Copy the left halves of
Aandxto the left PE, and the right halves to the right PE - After the device kernel completes, copy
yback from the right PE
run.py, shown below.
Copy b into y of the Left PE
b is copied into y of the left PE here:
memcpy call.
Copy A and x
A and x are copied to the device as follows:
memcpy calls copy data into
both the left and right PE.
Because A is now stored column-major on the PEs, the A
matrix is transposed, then flattened to a 1D array with ravel().
Each PE gets M*N_per_PE elements, so each PE gets N_per_PE columns
of A.
Similarly, each PE gets N_per_PE elements of x.
Copy Back the Result
y is copied back from the right PE as follows:
memcpy call copies back the M elements of y
only from the right PE.
Once this call is complete, as in the previous tutorials,
the received result is checked for correctness.
Compile and Run the Program
Since this program only uses two PEs, the simulated fabric dimensions are adjusted accordingly:SUCCESS! message at the end of execution.